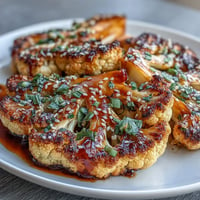
 Save
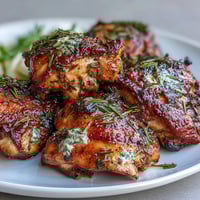
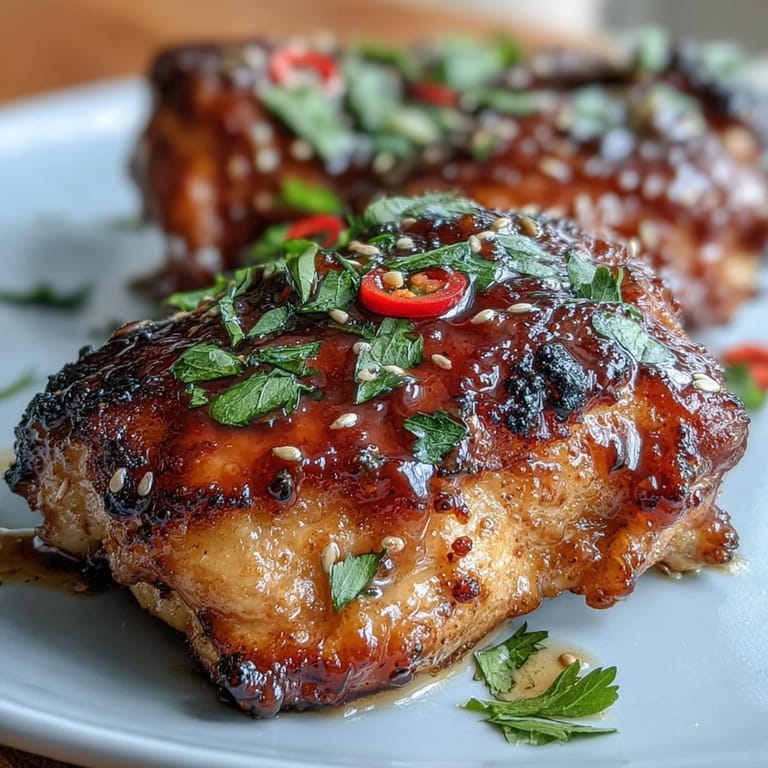
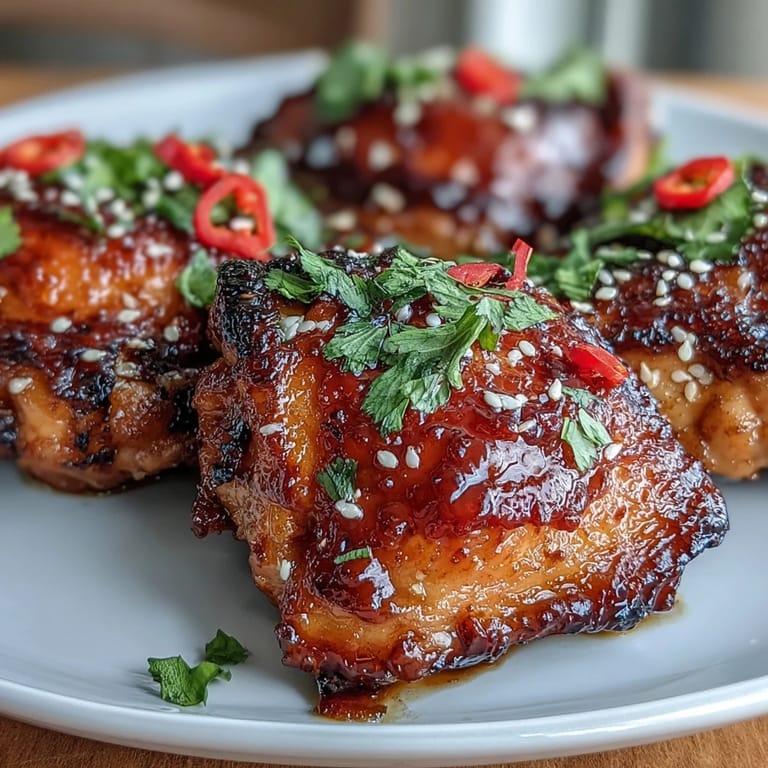
Save There's something about the way chili jam catches the light when it's bubbling on roasted chicken that made me stop mid-dinner conversation one random Tuesday night. My friend had brought over a jar of homemade chili jam as a hostess gift, and instead of saving it for something fancy, I decided to throw together whatever chicken I had in the fridge. Thirty-five minutes later, we were fighting over the last piece, the sticky-sweet glaze clinging to our fingers as we ate straight from the platter. That moment proved that the best dishes often come from happy accidents and a willingness to experiment with what's already in your kitchen.
I made this for a casual Friday night gathering where nobody expected much beyond takeout vibes, and watching people's faces light up when they bit into that first piece was the kind of small kitchen victory that sticks with you. One guest actually asked if I'd been secretly trained as a chef, which made me laugh out loud because I was literally just following my instincts with condiments. That's when I realized this dish has a way of turning an ordinary weeknight into something that feels a little bit special.
Ingredients
- Bone-in, skin-on chicken thighs: Eight pieces give you enough surface area for the glaze to cling to, and the bones keep the meat tender even with high-heat roasting.
- Chili jam: This is the star, so grab a good quality one or make your own if you're feeling ambitious—it brings the sweet-spicy backbone that makes everything else worthwhile.
- Soy sauce: Use tamari if you're avoiding gluten, and don't skimp on the amount because it adds umami depth that balances the jam's sweetness.
- Honey: Just a tablespoon reinforces the sweetness without overwhelming the savory elements.
- Rice vinegar or apple cider vinegar: This cuts through the richness and adds a subtle brightness that lifts the entire glaze.
- Garlic and fresh ginger: Minced and grated respectively, these aromatics wake up your palate and prevent the dish from tasting one-dimensional.
- Spring onions, fresh chili, cilantro, and sesame seeds: These garnishes aren't just pretty—they add texture and freshness that contrast beautifully with the sticky glaze.
Tired of Takeout? 🥡
Get 10 meals you can make faster than delivery arrives. Seriously.
One email. No spam. Unsubscribe anytime.
Instructions
- Get your oven and tray ready:
- Preheat to 200°C (400°F) and line your baking tray with parchment paper so cleanup becomes effortless and nothing sticks.
- Prepare the chicken:
- Pat those thighs completely dry with paper towels—this is the trick that lets the skin crisp up instead of steaming. Arrange them skin-side up, then hit them lightly with salt and pepper.
- Mix the glaze:
- Whisk together the chili jam, soy sauce, honey, vinegar, minced garlic, and grated ginger until you have something smooth and cohesive. You'll feel the glaze come together beautifully, and that's how you know you're on the right track.
- First coat of glaze:
- Brush a generous layer over each chicken thigh, saving about one-third of the mixture for round two. This two-stage glaze method ensures you get both caramelization and stick without burning.
- First roast:
- Let them go for 30 minutes, and try not to open the oven door—the heat needs to stay steady so the skin can render its fat and turn golden.
- Add the final glaze:
- Pull the tray out, brush on the reserved glaze, and listen to that sizzle as the heat reactivates everything. It's pure auditory satisfaction.
- Final roast and rest:
- Back in for 5 to 8 minutes until your instant-read thermometer hits 75°C (165°F) and the glaze is caramelized and sticky. Let everything rest for 5 minutes so the juices redistribute, then move to your serving platter and garnish if you're feeling fancy.
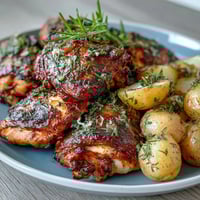
 Save
Save There's a moment when the second coat of glaze hits the hot chicken and everything sizzles at once that feels almost orchestrated, like you've just pulled off something intentional and impressive. That's the moment when cooking stops feeling like a task and starts feeling like creating something worth sharing.
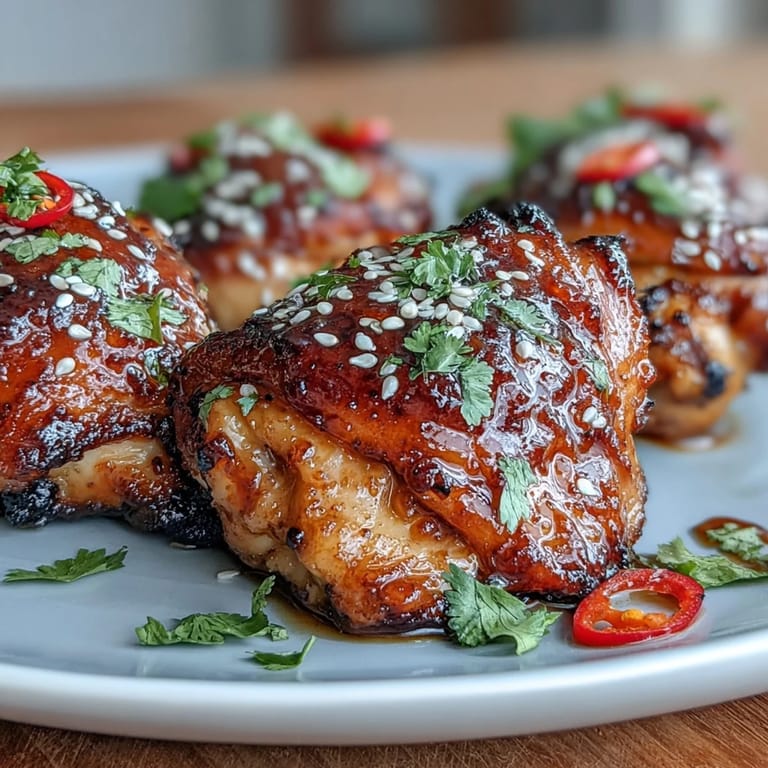
The Magic of Two-Stage Glazing
I used to think one coat of glaze was enough until I realized that early glazing just gets absorbed into the meat while it cooks, which is great for flavor but terrible for that glossy exterior. Holding back the second coat lets you apply it near the end when the chicken is already hot and the glaze can caramelize directly on the surface, turning sticky and dark and absolutely irresistible. It's a small technique shift that transforms the whole dish from good to genuinely craveable.
Playing with Heat Levels
The beauty of this recipe is how easily it adapts to your spice tolerance, which I discovered when cooking for a group with wildly different heat preferences. If you want more kick, a teaspoon of sriracha or hot sauce stirred into the glaze before brushing ramps everything up without making it unbearably fiery. Start conservative and taste as you go—you can always add more heat, but you can't take it back.
Serving and Storage Wisdom
Steamed rice soaks up the glaze like a dream, and roasted vegetables or a crisp salad provide the textural contrast that makes every bite interesting. Leftovers keep beautifully in the fridge for three days and actually taste better cold or gently reheated, making this a sneaky smart choice for meal prep. You can also substitute drumsticks or wings if you're cooking for a crowd—just adjust the cooking time down by about 10 minutes since they're smaller.
- Let any leftover glazed chicken come to room temperature before refrigerating to avoid condensation that makes the skin soggy.
- Reheat gently in a low oven rather than the microwave so the glaze stays sticky instead of turning rubber-like.
- Bone-in chicken always yields juicier results than boneless, and the effort to eat around bones is absolutely worth the payoff.
 Save
Save This dish has become my go-to when I want to feel like I've put in real effort without actually stressing in the kitchen. Every time I make it, I'm grateful for that random Tuesday night that led me here.
Recipe FAQs
- → What cut of chicken works best for this glaze?
Bone-in, skin-on chicken thighs are recommended for their flavor and juiciness, but drumsticks or wings can be used with cooking time adjustments.
- → Can I make this dish gluten-free?
Yes, use tamari instead of regular soy sauce and check chili jam ingredients for gluten content to keep it gluten-free.
- → How do I achieve a sticky glaze on the chicken?
Apply the chili jam glaze before roasting and again near the end of cooking to caramelize and create a sticky coating.
- → What sides pair well with this chicken glaze?
Steamed rice, roasted vegetables, or crisp salads complement the sweet-spicy flavors nicely.
- → Can I adjust the heat level of the glaze?
For extra heat, add sriracha or hot sauce to the glaze mixture according to your taste.