 Save
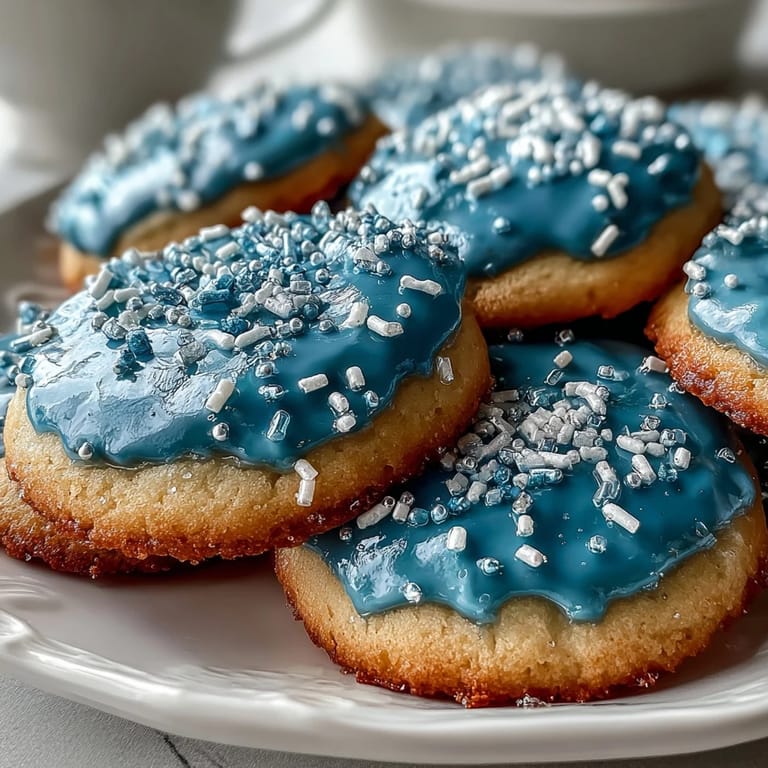
Save My kitchen smelled like pure vanilla for three days straight after my niece begged me to make Pure Vanilla Cookie-inspired sugar cookies for her gaming tournament watch party. She'd been obsessed with Cookie Run Kingdom, and when she mentioned these delicate, ethereal cookies with their glossy blue and white icing, I knew I had to attempt them. The first batch came out slightly too thick, but by the third try, I nailed that perfect tender crumb that made everyone ask for the recipe. There's something magical about turning a video game character into an actual edible creation that makes people smile.
I'll never forget watching my sister pipe intricate details onto these cookies while her kids narrated the designs like sports commentators, declaring which ones looked most like the Pure Vanilla Cookie character. What started as a quiet Sunday afternoon baking project turned into this impromptu family art session, complete with debate over whether the gold icing should be more yellow or more orange. Those cookies sat in the center of our table for days, and honestly, nobody wanted to be the first person to eat one because they looked too pretty.
Ingredients
- All-purpose flour (2 1/2 cups): The foundation of everything, and sifting it with the dry ingredients prevents lumps that create tough, disappointing cookies.
- Unsalted butter (3/4 cup): Room temperature is non-negotiable here, as cold butter won't cream properly and warm butter makes the dough greasy and shapeless.
- Granulated sugar (1 cup): This is what makes them snappy at the edges while staying tender in the middle, so don't skip the creaming step.
- Pure vanilla extract (2 tsp): The cheapest vanilla won't cut it, the pure stuff is what gives these cookies their elegant, subtle flavor that Pure Vanilla Cookie would be proud of.
- Baking powder (1/2 tsp): Just enough to help them rise slightly without making them cake-like or airy.
- Egg (1 large): Room temperature eggs incorporate more smoothly and create a better texture than cold ones straight from the fridge.
- Powdered sugar (2 cups for icing): Sift it before using or your icing will have tiny lumps that clog piping bags and ruin your delicate designs.
- Meringue powder (2 tbsp): This magical ingredient stabilizes the icing so it dries hard and glossy instead of staying sticky and soft.
- Gel food coloring (optional): Gel is stronger than liquid food coloring, so you use less and don't thin out your icing like you would with other types.
Tired of Takeout? 🥡
Get 10 meals you can make faster than delivery arrives. Seriously.
One email. No spam. Unsubscribe anytime.
Instructions
- Combine your dry team:
- Whisk the flour, baking powder, and salt together in a medium bowl and set it aside, this prevents lumps and ensures the leavening is evenly distributed throughout. Think of it as giving your dry ingredients a chance to get to know each other before the party starts.
- Cream that butter and sugar:
- Beat the softened butter and sugar together until the mixture is pale, fluffy, and looks almost like frosting (about 2 to 3 minutes), this step is where the magic happens. You're incorporating air that will make your cookies tender instead of dense, so don't rush it or use cold butter straight from the fridge.
- Wake up the wet ingredients:
- Add the egg, vanilla extract, and milk to the butter mixture and beat until everything is smooth and combined. The milk might seem odd, but it adds just enough moisture to create that perfect tender crumb without making the dough sticky.
- Marry wet and dry:
- Gradually add the dry ingredients to the wet mixture, stirring just until the dough comes together. Overmixing at this point develops gluten and makes your cookies tough, so stop as soon as you don't see any white streaks of flour.
- Chill like you mean it:
- Divide the dough into two disks, wrap them tightly in plastic wrap, and refrigerate for at least one hour (or up to overnight if you're planning ahead). Cold dough doesn't spread as much in the oven, which means your cookies hold their shape and stay thick instead of turning into thin, crispy wafers.
- Set the stage for baking:
- Preheat your oven to 350°F and line your baking sheets with parchment paper so cleanup is easier and your cookies don't stick. While the oven heats, roll out your chilled dough on a lightly floured surface to about 1/4-inch thickness, it should feel cool to the touch and slightly resist your rolling pin.
- Cut your shapes:
- Use your favorite cookie cutters to create shapes (pure vanilla cookie-shaped ones are perfect for theme matching), and transfer them to your prepared baking sheets with about 1 inch of space between each cookie. They won't spread much since the dough is chilled, but giving them breathing room ensures even baking.
- Bake to golden perfection:
- Bake for 10 to 12 minutes, watching for the edges to just barely turn golden while the centers still look slightly underdone, they'll continue cooking on the hot pan after you remove them from the oven. Let them sit on the baking sheet for 5 minutes to firm up, then transfer to a wire rack to cool completely before decorating.
- Build your royal icing:
- In a large bowl, combine the sifted powdered sugar, meringue powder, vanilla extract, and 4 tablespoons of warm water, then beat with an electric mixer on low speed until smooth and glossy. The consistency should be like thick frosting at first, then gradually add warm water one teaspoon at a time until it flows smoothly from a piping bag without running all over your cookies.
- Tint your vision:
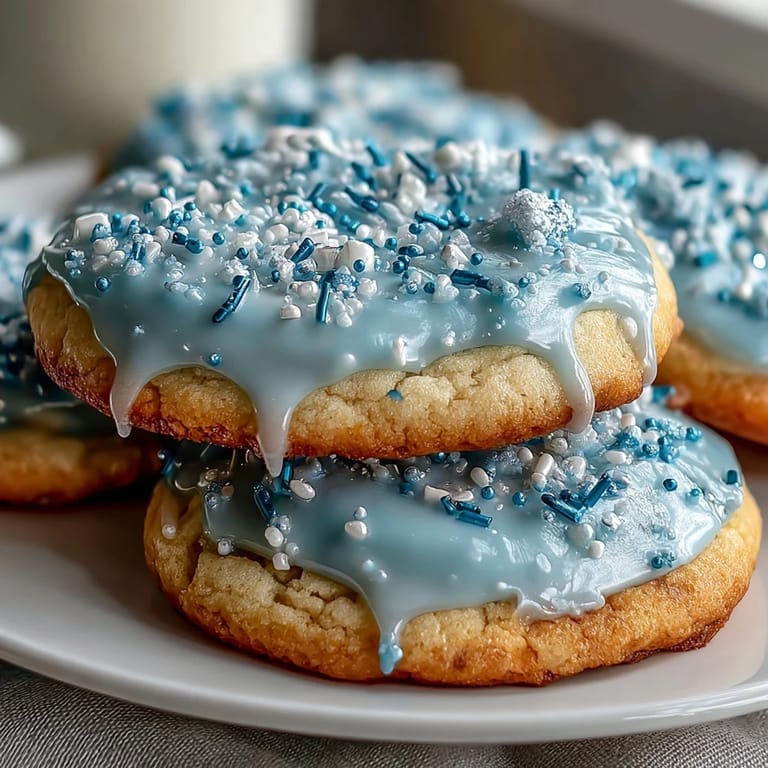
- Divide your white icing into bowls and add gel food coloring drop by drop, stirring until you reach the shade you want. For Pure Vanilla Cookie theme, pale blue and crisp white create that elegant look, with touches of gold or pale yellow for accent details.
- Decorate with intention:
- Using piping bags fitted with fine tips or simple squeeze bottles, pipe your icing designs onto fully cooled cookies and let your creativity run wild. Allow the icing to set completely (about 2 to 4 hours depending on humidity) before stacking or storing, the harder it gets, the more stackable and portable your cookies become.
 Save
Save There was something deeply satisfying about standing in my kitchen at midnight, piping tiny details onto these cookies while a rain storm rolled through outside, completely alone with my thoughts and a piping bag. By the time I finished, my hands were tired and my kitchen looked like a powdered sugar explosion, but lined up on the cooling rack were 24 perfect little cookies that actually looked like they came from a bakery, not a home kitchen. That's when I understood why people get obsessed with decorating cookies, it's meditation and art rolled into one sugary package.
The Secret to Crispy Edges and Tender Centers
The trick that changed my cookie game forever was pulling them out just before they look completely done, when the edges have turned golden but the centers still have the slightest wobble when you gently shake the pan. This is counterintuitive because you worry they're underbaked, but they continue cooking on the residual heat of the hot pan while they sit for those crucial five minutes. The moment you transfer them to the cooling rack is when they're actually perfect, and this technique works for every single sugar cookie recipe I've tried since then.
Why Fresh Vanilla Matters More Than You Think
I used to think vanilla extract was vanilla extract, buying whatever was cheapest at the grocery store without reading the label. The first time I made these cookies with pure vanilla instead of imitation, my whole family asked what I'd changed because they tasted somehow more elegant and refined. It's because imitation vanilla is a single compound, while pure vanilla extract contains hundreds of flavor molecules that create depth and complexity that imitation simply can't match, especially in something as vanilla-forward as these cookies.
Storage and Gifting Like a Professional
These cookies stay fresh for up to one week in an airtight container at room temperature, and the royal icing actually hardens into a protective shell that keeps them even fresher longer. I've packaged them in clear cellophane bags tied with ribbon and handed them to neighbors, teachers, and friends, and every single time someone comes back asking for the recipe or just for more cookies. The beautiful thing about royal icing is that it transforms these cookies into gifts people actually want to display before eating them, they're almost too pretty to consume but too delicious to resist.
- Stack them with parchment paper between layers so the icing doesn't crack or stick to the layer above.
- Store them in a cool, dry place away from humidity or they'll get soft instead of staying crisp at the edges.
- If you want to make them ahead, freeze the decorated cookies in a single layer on a baking sheet, then transfer to freezer bags for up to three months.
 Save
Save Every time I make these cookies now, they transport me back to that watch party afternoon when my niece's face lit up seeing her favorite game character transformed into something she could actually eat. They're more than just cookies, they're a small edible gesture that says you care enough to spend time creating something beautiful and delicious just for someone else.
Recipe FAQs
- → How long should the dough be chilled before baking?
The dough should be chilled for at least one hour to help maintain cookie shape during baking.
- → What gives the icing its glossy finish?
The royal icing becomes glossy by beating powdered sugar with meringue powder and water until smooth and shiny.
- → Can I use different colors for the icing decoration?
Yes, gel food coloring can be added to create various decorative hues for the icing.
- → What is the ideal thickness for rolling out the dough?
Roll dough to about 1/4-inch (6mm) thickness for even baking and a tender texture.
- → How should decorated cookies be stored?
Store fully iced cookies in an airtight container at room temperature for up to one week.
- → Why is royal icing suitable for stacking cookies?
Royal icing dries hard, preventing sticking and allowing cookies to be stacked securely.