 Save
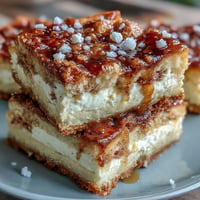
Save My kitchen smelled like warm cinnamon for three days straight after I first nailed these rolls, and honestly, I didn't mind one bit. There's something about the moment when you pull them from the oven—golden, puffy, almost glowing—that makes you feel like you've accomplished something real. These aren't the dense, heavy rolls you get from a can; they're impossibly soft, the kind that practically melt on your tongue. I've made them maybe fifty times now, and they still surprise me with how straightforward they are, especially once you understand what the dough actually wants from you.
I brought a batch to my neighbor's house on a Saturday morning, and she actually cried a little when she bit into one—the kind of reaction that makes you realize food is more than fuel. Her kids started calling them "the fancy rolls" and suddenly my kitchen became their favorite destination before school. That moment taught me that these rolls have a quiet power to make people feel cared for, which is maybe the best reason to bake anything at all.
Ingredients
- All-purpose flour (4 cups): This is your foundation; don't skip the measuring cup and level it off with a knife, or you'll end up with dense rolls that feel more like hockey pucks than pillows.
- Active dry yeast (2 1/4 tsp): The warm milk should feel like a comfortable bath on your wrist—too hot and you'll kill the yeast, too cool and nothing happens.
- Warm milk (1 cup): Temperature matters here more than anywhere else; use a thermometer if you have one, aim for around 110°F.
- Granulated sugar (1/3 cup): Split between waking up the yeast and building flavor into the dough itself.
- Unsalted butter, melted (1/3 cup): Melted butter makes the dough tender and gives it that rich, almost brioche-like crumb.
- Large eggs, room temperature (2): Cold eggs won't blend smoothly into the dough; let them sit out while your yeast activates.
- Salt (1 tsp): This brightens everything and actually strengthens the gluten structure, even though it sounds counterintuitive.
- Packed light brown sugar (2/3 cup): Brown sugar has molasses, which adds a subtle depth that regular sugar just can't match in the filling.
- Ground cinnamon (2 1/2 tbsp): Don't be shy here—this is where you taste the spice, and fresh cinnamon makes all the difference.
- Unsalted butter, very soft (1/4 cup): For the filling, you need butter that spreads like soft frosting, not cold and crumbly.
- Cream cheese, softened (4 oz): Softened means it should be at room temperature, almost fluffy when you touch it.
- Unsalted butter, softened (1/4 cup): This goes into the glaze and makes it creamy without being too heavy.
- Powdered sugar, sifted (1 cup): Sifting removes lumps and helps the glaze stay smooth and spreadable.
- Vanilla extract (1/2 tsp): Just a whisper of vanilla rounds out the sweetness in the glaze.
- Milk (2–3 tbsp): This adjusts the glaze consistency; add it gradually until you reach that perfect spreadable texture.
Tired of Takeout? 🥡
Get 10 meals you can make faster than delivery arrives. Seriously.
One email. No spam. Unsubscribe anytime.
Instructions
- Wake up the yeast:
- Pour your warm milk into a large bowl and sprinkle in the yeast with 1 tablespoon of sugar, then wait. You'll watch it transform from powder to foam, and that's when you know everything's about to work.
- Build your dough base:
- Add the remaining sugar, melted butter, room-temperature eggs, and salt to your foamy mixture, stirring until everything is wet and shaggy. This is where the dough actually begins to come alive.
- Bring it together gradually:
- Sprinkle in your flour a cup at a time, stirring between each addition until the dough becomes too thick to stir anymore. You're looking for a soft, slightly sticky dough that clears the bowl but still clings to your hands.
- Knead until smooth:
- Turn the dough onto a lightly floured surface and knead for 6 to 8 minutes, using the heel of your hand to push it away and folding it back toward you. After a few minutes, you'll feel it transform from rough to satiny—that's when you know the gluten is developed.
- Let it rise:
- Place the dough in a greased bowl, cover it with a damp towel or plastic wrap, and set it somewhere warm (near a sunny window or on top of the fridge works beautifully). In about an hour, it should roughly double in size, and poking it gently should leave a small indentation.
- Shape your canvas:
- Punch down the dough with your fist (this always feels satisfying), then roll it out on a lightly floured surface into a 16-by-12-inch rectangle. The rectangle doesn't have to be perfect; what matters is even thickness so the rolls bake uniformly.
- Spread and layer:
- Take your very soft butter and spread it evenly over the entire rectangle, then sprinkle the cinnamon-sugar mixture right over top. The filling should coat everything, with maybe slightly more concentrated at the edges.
- Roll with intention:
- Starting from one long edge, roll the dough toward you as tightly as you can without ripping it, then pinch the seam to seal. You're creating a long log that will become twelve individual rolls.
- Cut with care:
- Using a sharp knife dipped in water (or dental floss pulled tight), cut your log into twelve equal pieces, being as gentle as possible so you don't squash them. Wipe your knife between cuts to keep the edges clean.
- Second rise:
- Arrange your rolls cut-side up in a greased 9-by-13-inch baking dish, cover them, and let them rise again for 35 to 45 minutes until they're puffy and nearly touching each other. This is when your kitchen will start smelling like a cinnamon dream.
- Bake until golden:
- Preheat your oven to 350°F while the rolls finish rising, then bake them for 22 to 25 minutes until the tops are a deep golden brown. They should look slightly firm on top but still feel a little soft when you touch them gently.
- Make your glaze:
- While the rolls bake, beat together your softened cream cheese, softened butter, sifted powdered sugar, and vanilla until smooth, then add milk a tablespoon at a time until you have something that spreads like thick frosting. Taste it—adjust sweetness or vanilla to your preference.
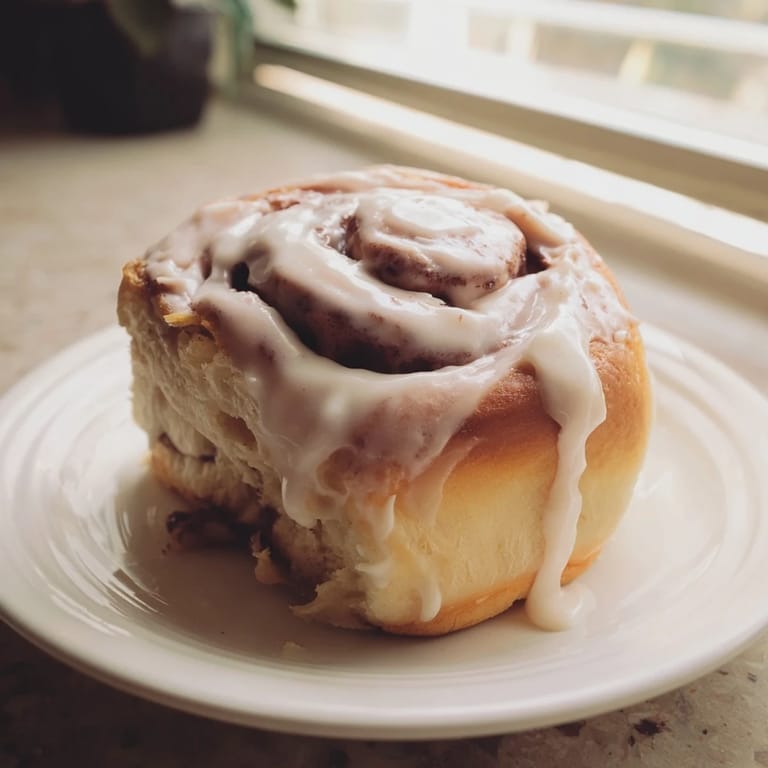
- Finish warm:
- Let your rolls cool for about 10 minutes so they're still warm but not too hot to glaze, then spread that cream cheese mixture generously over the top. Serve them immediately while they're still warm and the glaze is setting into all those crevices.
 Save
Save There was a morning when my partner made these without telling me, and I woke up to the smell of cinnamon and warm butter—I genuinely thought I was dreaming for a few seconds. Food that makes someone feel loved before they even taste it is food worth knowing how to make well.
The Science of Softness
What makes these rolls so pillowy comes down to three things: the right balance of fat (from butter and eggs), a gentle hand during kneading, and proper rising time. The fat coats the gluten strands, which prevents them from tightening up too much and keeps the final texture tender rather than chewy. I learned this the hard way after over-kneading a batch and ending up with rolls that had the texture of a small rubber ball—salvageable but not what we were after. Now I stop the moment the dough feels smooth and elastic, usually around the 8-minute mark, and the results are consistently soft.
Timing and Temperature Tricks
The key to reliable rising is consistent warmth, which doesn't always mean your kitchen is naturally warm. In winter, I turn on the oven light and let the dough rise inside with the light on—it creates a perfect 75–80°F environment. If you're in a hurry and want faster rising, you can increase the yeast slightly (to 2 1/2 teaspoons), but this sometimes makes the rolls taste a bit yeasty, so I only do it when necessary. The overnight method in the notes is genuinely foolproof; shape them in the evening, refrigerate them, and let them come to room temperature in the morning before baking.
Variations and Personalization
These rolls are a beautiful blank canvas, and I've experimented with everything from cardamom to nutmeg in the filling, sometimes swapping half the brown sugar for dark brown for deeper flavor. Chopped pecans, walnuts, or raisins stirred into the cinnamon mixture add texture without changing the fundamental softness. The cream cheese glaze is iconic, but you could also finish them with a simple maple glaze or even just a sprinkle of fleur de sel if you're feeling minimalist.
- Pecans and raisins add familiar comfort, though watch for moisture if using the raisins.
- A pinch of sea salt on top before baking brightens the cinnamon in surprising ways.
- Leftover rolls actually toast beautifully the next day if you manage to have any left.
 Save
Save These rolls have become my go-to gift and my quiet way of saying I'm thinking of someone, because there's something about homemade cinnamon rolls that feels personal in a way store-bought never could. Once you make them a few times, they become automatic, and that's when the real magic happens—when you can make something delicious without thinking too hard about it.
Recipe FAQs
- → How do I keep cinnamon rolls soft and fluffy?
Use bread flour for extra tenderness, avoid overbaking by checking for golden brown edges at 22-25 minutes, and apply glaze while rolls are still warm so it absorbs into the crumb. Store covered at room temperature to maintain moisture.
- → Can I prepare these rolls in advance?
Yes, assemble rolls through step 6, cover the baking dish, and refrigerate overnight. The next morning, let them rise at room temperature for about 1 hour until nearly doubled before baking. This slow rise actually develops better flavor.
- → What's the best way to slice rolls without squishing them?
Use a sharp serrated knife or dental floss. For dental floss, insert it under the dough at your desired cut point, cross the ends over the top, and pull down in a sawing motion. This prevents compression and yields clean slices.
- → How should I store leftover rolls?
Keep cooled rolls in an airtight container at room temperature for up to 3 days, or refrigerate for up to 1 week. Reheat gently in a 300°F oven for 10-15 minutes, or microwave individually for 20-30 seconds until warm.
- → What can I add to customize the filling?
Chopped pecans, walnuts, or raisins work beautifully stirred into the cinnamon-sugar mixture. You can also brush the dough with a touch of maple syrup before adding filling for deeper flavor complexity.
- → Why is my dough not rising properly?
Ensure yeast is fresh and the environment is warm (68-75°F). Warm milk should register 110°F—use a thermometer as too-hot liquid kills yeast while too-cool liquid slows fermentation. Cover dough to prevent surface drying.